Wednesday, June 29, 2011

Image Transfer: 1st attempt

I just want to share my first attempt in doing image transfer technique using heat transfer paper (commonly use for shirt printing)

WARNING: the following images are explicit and may be deemed offensive. Reader discretion is advised.

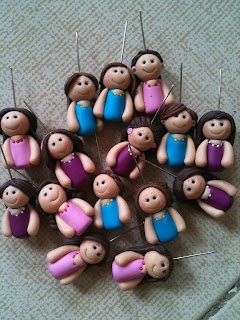
This project was commissioned by my brother's friend whose getting married next month. I suggested a personalized chibi of her guests with their name stamped on the *tooot*.
After finishing all 20 pieces I had some second thought and decided to toss this out. Why??? Conservative ang lola mo! LoL… Kidding aside, I felt responsible for those guests that will be offended seeing their names on a *tooot*. With my client’s permission, I made some changes on our initial plan.

Initial plan : XXX


I browse the net trying to look for a caricature or cartoonish image of the *toot*. Lucky enough I found this image of it wearing a night gown which is really perfect for this theme. Since I have hundreds of heat transfer paper I use on my digital press business, I decided to do image transfer on my clay. NOTE: I learned this technique from youtube and from my fellow clay friends (KUDOS!!!)

Here’s the quick step for this technique

1.      Print the MIRROR image on the transfer paper
Mirror Image Sample
2.      Cut the image as desired
3.      Prepare your clay and cut it accordingly (don’t forget to condition your clay and put a hole if needed)
4.      Apply a thin and even layer of TLS on top of the clay   
5.      Place the paper on top with the printed side facing the clay with TLS (press the paper carefully to remove air trapped in between
6.      Bake as instructed


 DONE!!! Since this is my first time to try this technique, your suggestion or comment is highly appreciated..


Thursday, June 23, 2011

DIY: Alpha Stamps

I wanted a specific font style on my next souvenir project and so I decided to make my own stamp. Here are the basic materials and tools I used for this project.


* I chose Nendo for this project because of the rubber like finish of the clay when you properly cure it *

  • Cut the printed letters with your desired font and size
  • Bake a thin slice of clay until the instructed curing time and temperature or until the desired end result is achieve (preheat the oven until you reach 130deg. since this specific brand of clay tends to form some bubbles on high temperature especially on thin cut)
  • Paste the precut letter on top of the clay and carefully cut or slice the clay following the exact pattern
  • When your satisfied with the edges, attach the letter to a flat base (on my case I used a thicker clay as a stamp base)
Here is the finished product


I realized that making your own alpha stamp is not that easy but I'm really happy with the finished product. Not to mention the amount of money saved when you buy the complete expensive set of alphabet stamps available in the market.

Monday, June 13, 2011

Oven Thermometer: Must Have!!!

I never realized that I had to purchase an oven thermometer after some months of claying. I bought this cheap electric oven with built in thermostat hoping it serves the purpose and will save me time and money. Well I guess I was wrong. I thought my pieces were OK until I bought a CP charm from a clayist friend (claythinz). Her chibi is very durable considering the cute little size of it. I dropped it several times but no body parts fell off. That’s when I realized that HEY I think I’m doing something wrong here. I seek advices from fellow clayist and decided to buy an oven thermometer. I tried looking in the supermarket and nearby malls (stingy of me trying to save a bit and find something cheap) but oooppsss no luck. I searched online and found Genty’s clay haven. The oven thermometer cost me Php390 and also bought some other stuff (maximizing the shipping fee cost hehehehe). 


 My new best buddy!

I tried it first without anything inside just to compare the temperature reading of the thermostat versus the thermometer. My oven is 30 deg celsius off than the actual reading. Now I know why most of my pieces were either under baked or over baked. 

Sample project without using oven thermometer. Thermostat reading: 130 deg and baked for 30 mins. See how the hair fell off. Such a waste!

After several attempts and 20 pcs burnt chibi heads, I finally got the settings right.. Preheating the oven for 5 mins then kept the temperature reading between 120-135 deg within 20mins. The result is perfect (well at least for me!).

My first successful project after using the thermometer
NOTE: if your oven is pretty accurate then it must be the conditioning process. Check which one works on you.


Saturday, June 11, 2011

Polymer Clay Art

When I was pregnant with my 2nd born son, I discovered polymer clay art from a friend. It started as a hobby to ease my boredom and ends up as an addiction. I continuously search and discover new techniques and so far loving every details of it. Recently I joined groups of polymer clay artist on facebook —>  Clayfriends and Polymer Clay People Philippines.  I never imagined you can meet real and sincere friends online that are willing to help and share their God given talents. We all share common interest in art particularly polymer clay. We wanted to create a friendly environment for all fellow polymer clay artists, showcase their amazing art pieces and promote polymer clay art in the Philippines. Last week Polymer Clay People Philippines (P3) asked all the members to submit 3 photos of their works. Here are the photos I submitted for the guild.

My first ever souvenir order from Bahrain. Princess theme birthday souvenir. Crown shaped key chain and magic wand key chain —> all engraved with the celebrant’s name

Noah’s ark theme (baptismal souvenir). One of the most challenging project for me since the client wants a specific photo as an inspiration to her son’s baptismal favor. 12 pcs assorted animal key chain with name plate, photo holder with Godparents’ name and cake topper.

These were my son’s baptismal souvenir. Baby inside the bottle with hand shaped nameplate for the guests and miniature baby with the Godparents’ name plate.

Visit my online shop to view some of my featured creations 
Facebook : http://www.facebook.com/r2j.onlineshoppe
Multiply: http://r2jcreationz2010.multiply.com


Support our local artist

Like us on facebook  : Philippine Polymer Clay Guild
Visit our website : Clayfriends

Success!

And finally... After my second attempt, I now officially start my 1st blog... Yippeee!!!

 I decided to start blogging to somehow share just about anything that I find nice and interesting. Arts and craft #1, FOOD #2 (yum! yum!), Travel #3 and finally Mi' Familia. Let me first introduce myself. I’m Joann Austria-Obando, wife and mother of two cuties (Erus and Eryl). I am working as a site engineer on one US dredging company base in Bahrain. I’m also the owner and artist behind R2J Creationz which officially started this year.

Join me on this journey (",)... HAPPY READING!!!!

Hubby
baby Eryl


Kuya Erus
Men @ work